WordPress is a popular platform that helps you create and manage websites easily, without needing to know how to code. Its extensive library of plugins allows you to easily add features like SEO tools, e-commerce capabilities, and social media integration, making it highly customizable and adaptable to your specific needs. Starting an online store can be straightforward with WooCommerce, a popular and user-friendly plugin for WordPress
What is WooCommerce?
WooCommerce is a powerful and user-friendly plugin that turns your WordPress site into a full-fledged online store. Whether you’re selling physical products, digital downloads, or services, WooCommerce provides all the tools you need to set up shop. Ready to start your online store? This step-by-step guide will help you set up your online ecommerce store with WooCommerce on WordPress so you can begin selling your products in no time.
How to Install and Set Up WooCommerce
- Install and Activate WooCommerce
- Run the WooCommerce Setup Wizard
- Add Your Products
- Customize Your Store’s Appearance
- Set Up Additional Features
- Test Your Store
- Launch and Promote Your Store
- Monitor and Improve
1. Install and Activate WooCommerce
- Log in to your WordPress website to access th dashboard admin area.
- On the left-hand menu, click on Plugins, then select Add New.
- Search for WooCommerce: In the search bar at the top right, type “WooCommerce” and press Enter.

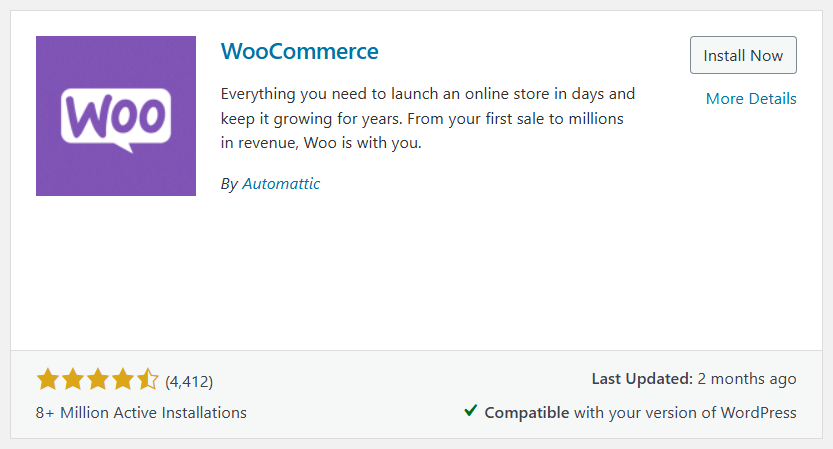
- Next to WooCommerce click the “Install Now” button, then the Activate.
Once the installation is complete, click Activate to enable it on your site.
2. Run the WooCommerce Setup Wizard
After activation, WooCommerce automatically creates key pages such as Shop, Cart, and Checkout. These pages are essential for your online store’s functionality.
WooCommerce will prompt you to go through a setup wizard to configure your store. You can click this to begin the configuration process or manually configure this later.
Enter Your Store Details
Fill in your store’s address, currency, and product types. This helps WooCommerce tailor the settings to your business needs.
Configure Shipping Options:
Set up where you want to ship your products, whether locally, nationally, or internationally, as well shipping methods, charge for shipping—flat rate, free shipping, or local pickup, etc.
Set Up Payment Methods/Gateways:
Select and configure payment options within the Settings > Payments section for options like PayPal, Stripe, or bank transfers to accept payments from your customers.
3. Add Your Products
From the WordPress dashboard, click on Products from the left menu, then Add New. Enter as much product details as you can for your stock, including:
- Title and Description: Add a product title and a detailed description.
- Product Data: Fill in information such as price, SKU (Stock Keeping Unit), and stock status. If your product has variations (like sizes or colors), set those up here.
- Product Images: Upload a main product image and additional gallery images to showcase your item.
Once you’ve added all the details, click “Publish” to make your product live on your store.
4. Customize Your Store’s Appearance
Go to Appearance > Themes and browse for a theme that suits your store’s look. There are many WooCommerce-compatible themes to choose from, both free and premium.
Customize Your Theme:
Click Customize under Appearance to adjust settings like your site’s logo, colors, and fonts. This helps align the store’s design with your brand.
5. Set Up Additional Features
Enhance your store with additional plugins for SEO, analytics, or marketing. Go to Plugins > Add New to find and install recommended plugins that fit your needs.
Fine-Tune WooCommerce Settings:
Visit WooCommerce > Settings to adjust settings like tax options, shipping methods, and payment gateways.
6. Test Your Store
Run test browsing, adding to cart, and order completion to ensure everything works smoothly from the customer’s perspective. This helps you spot and fix any issues before your store goes live.
Test Mobile Responsiveness:
Make sure your store looks good and functions well on mobile devices. This is crucial as many customers shop from their smartphones and tablets.
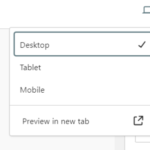
You can test on a mobile device if you have one, or in your browser on desktop, either through Settings (ellipsis) > More Tools > Developer Tools > Click the small icon with laptop with phone then choose other device types.
You can also test this directly from WordPress. Look for the Device icon at the top of the page editor, or on the customizer.


7. Launch and Promote Your Store
Go live! Once everything is set up and tested, you’re ready to launch. Announce your store’s opening through social media, email newsletters, friends and social groups, and other marketing channels.
8. Monitor and Improve:
Keep an eye on your store’s performance, gather customer feedback, and make improvements as needed to keep your store running smoothly.
You’ll have your ecommerce store up and running on your WordPress website with WooCommerce, ready to serve your customers and help your business thrive online.
